

Purple Ombre Cake
Last July I was asked to make a cake for my friends 18th birthday, which of course I was more than happy to do. Straight away I took to Pintrest to try and gain some inspiration, and to find something that I had never tried before. Ombre cakes have been very popular in recent years, and when I came across this type I was intrigued and excited to take on a new type of decoration.
Surprisingly, this technique was much easier than I first thought however, you do need some patience and time to make sure it looks perfect. I chose to do a purple ombre as this was my friends favourite colour however, you could chose any colour you like, or even try out a rainbow effect!
Purple Ombre Cake
Prep time: 20 minutes
Cook time: 25-30 minutes
Serves:10 people
Ingredients:
For the cake:
- 200g Butter
- 200g sugar
- 200g self raising flour
- 4 eggs (1 egg per 50g)
- 1 tsp vanilla extract
For the buttercream:
- 200g butter
- 400g icing sugar
- Purple gel colouring
Method
Firstly, preheat the oven to 160 degrees Celsius/gas mark three, and line two 18 inch cake tins.
Weigh out all ingredients, and combine the (softened) butter and sugar, until they reach a creamy consistency. Next add the eggs one at a time, making sure that you thoroughly mix to prevent the mixture from curdling. Once all the eggs have been added, sift in the flour and vanilla extract and slowly fold the mixture until all the ingredients are fully combined. Make sure at this stage the flour is folded not stirred to prevent any incorporated air bubbles from being knocked out, as these are what will make the cake light and fluffy.
If you wanted to jazz the cake up even more you could separate the mixture into three and add different amounts of food colouring to each part to make the inside also ombre.
Divide the mixture into your pre prepared cake tins and smooth over the top with a spatula.
Place in the oven for 20 to 25 minutes, or until springy to the touch.
Whilst the cake is in the oven make the buttercream by combining the icing sugar and softened butter, until fully combined. You may need to add a 1/2 a teaspoon of milk to loosen up the mixture and make it easier to pipe and spread.
Divide the buttercream into thirds and add a small amount of purple gel food colouring to two of the bowls. You can use liquid food colouring if you do not have gel however, I have found that this changes the consistency and sometimes the taste of the mixture. Once you have mixed in the food colouring and the buttercream is of your desired colours, place each mixture in separate piping bags that have plain, round nozzles attached.
Once the cakes are completely cooled spread about a third of the white buttercream onto one of the halves, and two tablespoons of strawberry jam on the other half. Sandwich together and place onto your desired cake stand, using a small 'blob' of icing on the base to ensure that the cake doesn't move.
Next 'crumb' the cake. Start by placing a third of the white icing on the top of the cake and spread it outwards until you are left with a thin layer covering the whole of the top of the cake. Now using a flat nozzle pipe all the way around the edge of the cake and smooth over using a spatula at a 90 degree angle. At this stage there will most likely be some icing overhanging the top of the cake. Spread this towards the middle of the top of the cake.
Once you have completed this stage you can start the decoration.
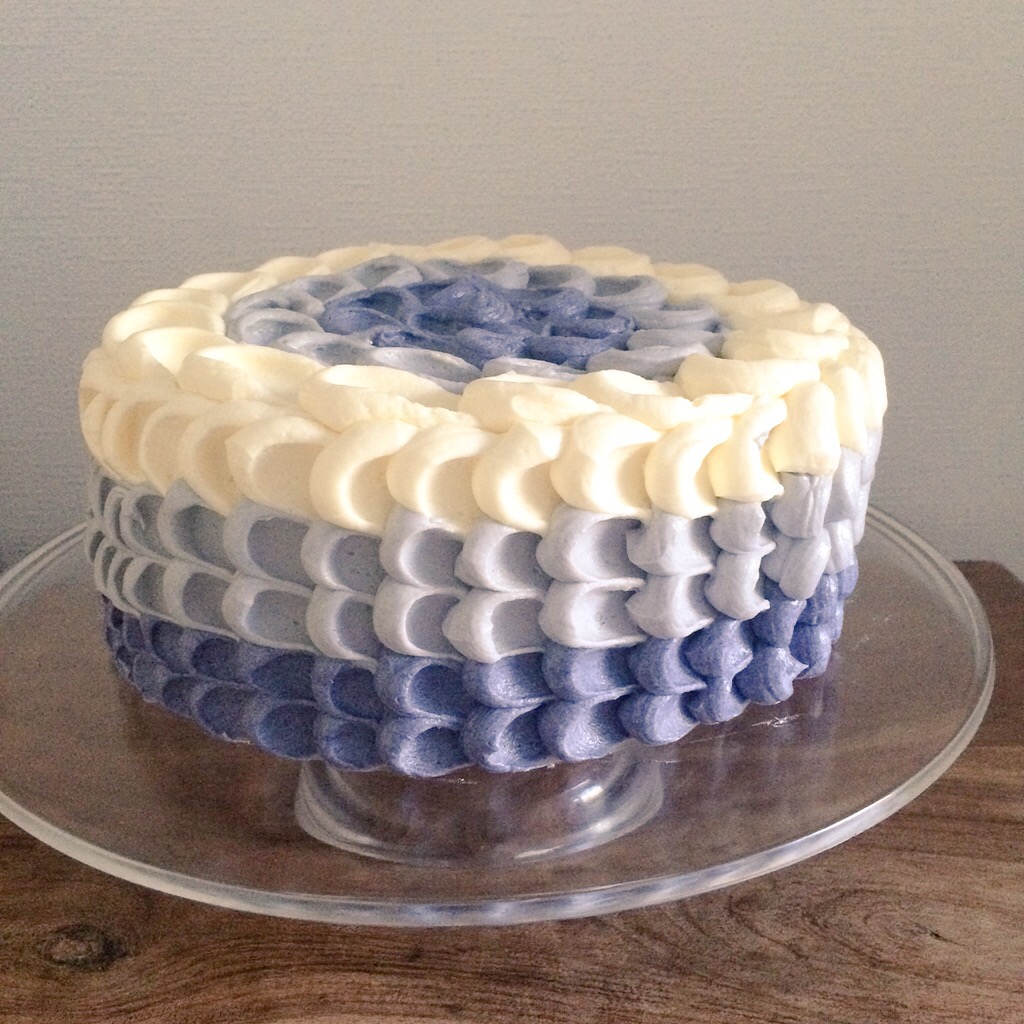
Starting at the bottom of the cake pipe a circle of the darkest icing about 1cm wide and 1cm deep. Then take a small teaspoon in the middle of the circle and drag it outwards to create the 'wave' effect. continue to do this in each colour all the way around the cake until covered.
Note: Don't worry too much if they are not all 'perfect', mistakes can be covered up by the next 'waves' of icing.

Next 'crumb' the cake. Start by placing a third of the white icing on the top of the cake and spread it outwards until you are left with a thin layer covering the whole of the top of the cake. Now using a flat nozzle pipe all the way around the edge of the cake and smooth over using a spatula at a 90 degree angle. At this stage there will most likely be some icing overhanging the top of the cake. Spread this towards the middle of the top of the cake.
Once you have completed this stage you can start the decoration.
Starting at the bottom of the cake pipe a circle of the darkest icing about 1cm wide and 1cm deep. Then take a small teaspoon in the middle of the circle and drag it outwards to create the 'wave' effect. continue to do this in each colour all the way around the cake until covered.
Note: Don't worry too much if they are not all 'perfect', mistakes can be covered up by the next 'waves' of icing.

I hope you enjoyed reading about my purple ombre cake and that it has inspired you to have a go and try a new technique!
Popular Posts
-
 Another family birthday meant another opportunity for me to get creative in the kitchen and produce a show stopping cake ready for the p...
 -
 Happy New Year! I hope whoever is reading this had a fun filled, and exciting end to 2017, and are raring to go at the start of the new...